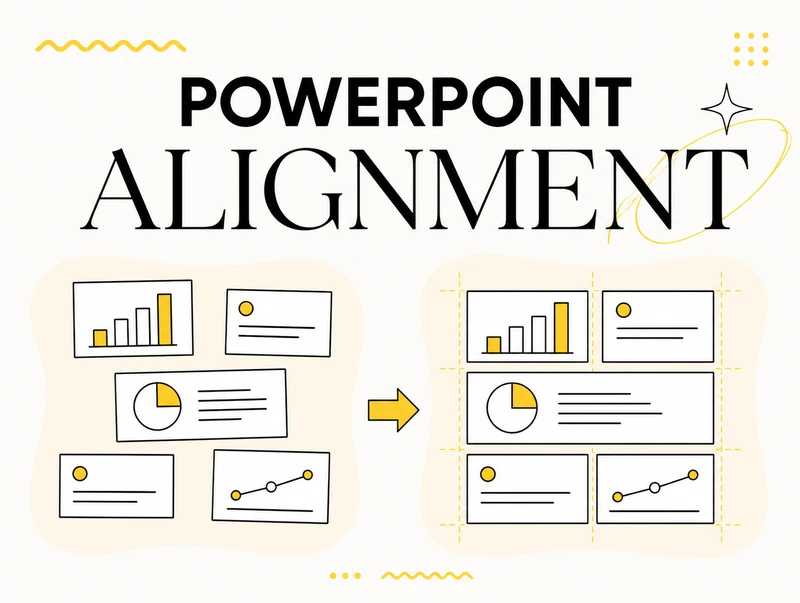

Good alignment is one of the fastest ways to make a PowerPoint slide look intentional. When titles, icons, text boxes and charts share clear edges and consistent spacing, the audience can understand the slide before consciously noticing the design.
This guide shows you how to align shapes and objects with PowerPoint’s native tools, how to distribute several objects evenly, why items sometimes move in an unexpected direction, and how the MLC PowerPoint Add-in can accelerate the same workflow when you format slides repeatedly.
For a broader system that connects alignment with consistent image cropping, connectors, slide libraries, timelines and other recurring tasks, explore our PowerPoint productivity workflows guide.
Quick answer: align objects in PowerPoint
- Select the shapes, pictures, text boxes or other objects you want to align.
- Open Shape Format, Picture Format or Graphics Format, depending on the selected object.
- Choose Align.
- Decide whether PowerPoint should align the objects to the selected objects or to the slide.
- Choose Align Left, Align Center, Align Right, Align Top, Align Middle or Align Bottom.
- To create equal gaps, select at least three objects and choose Distribute Horizontally or Distribute Vertically.
The crucial decision is step 4: aligning selected objects keeps the operation within the selection, while aligning to the slide uses the slide canvas as the reference.
Key takeaways
- Use Align Selected Objects when several elements should line up with one another.
- Use Align to Slide when an object or group should be positioned relative to the slide itself.
- Use Distribute with at least three objects to create equal spacing.
- PowerPoint’s native alignment is based on the selected set; it does not maintain the first selected object as a permanent reference object.
- Smart Guides are useful for quick manual placement, while alignment commands are more reliable for precise, repeatable layouts.
- The MLC PowerPoint Add-in brings the alignment and distribution commands together in a faster workflow and supports reference-object-based formatting.
Alignment and distribution are not the same thing
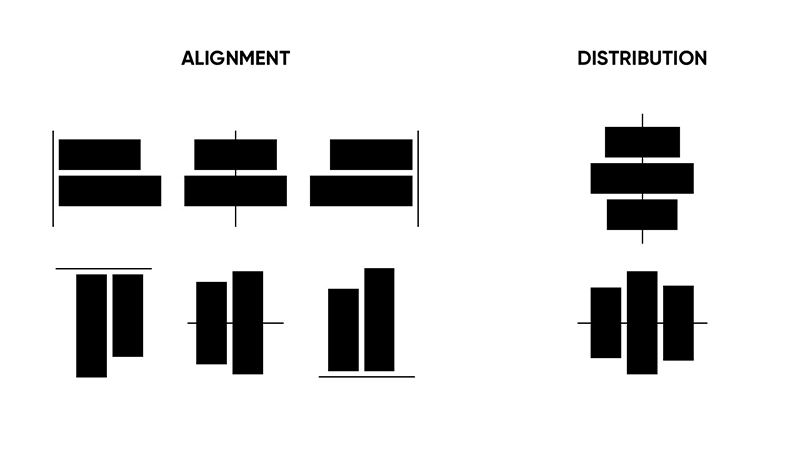
Alignment makes selected objects share an edge or a center line. For example, Align Left gives every selected object the same left coordinate, while Align Middle places their vertical centers on the same horizontal line.
Distribution does something different: it makes the space between objects equal. Distribute Horizontally creates consistent horizontal gaps; Distribute Vertically creates consistent vertical gaps.
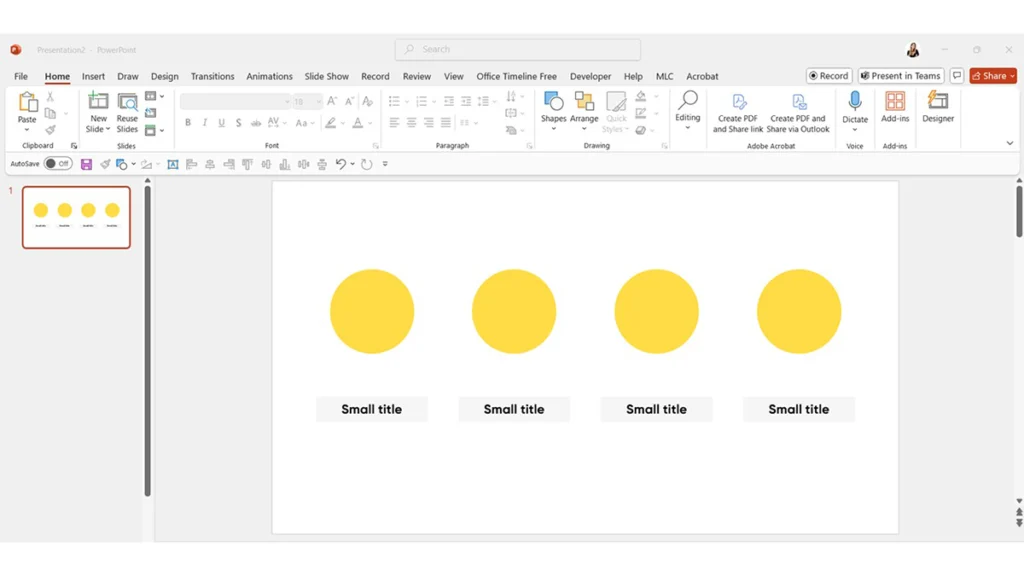
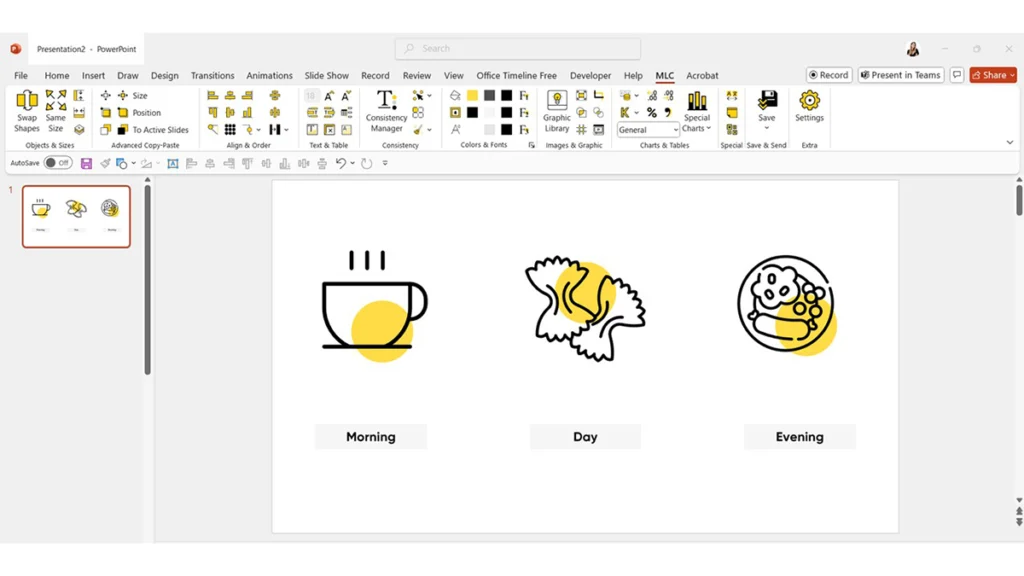
You will often use both commands in sequence. First align a row of icons along the middle, then distribute them horizontally to create equal rhythm.
How to align shapes and objects with PowerPoint’s native tools
1. Select every object that should participate
Hold Shift and click each object, or drag a selection box around the objects. You can align shapes, pictures, icons, text boxes, charts, tables and grouped objects.
If an object is difficult to select because it sits behind another element, open Home > Select > Selection Pane and select it by name.
2. Open the Align menu
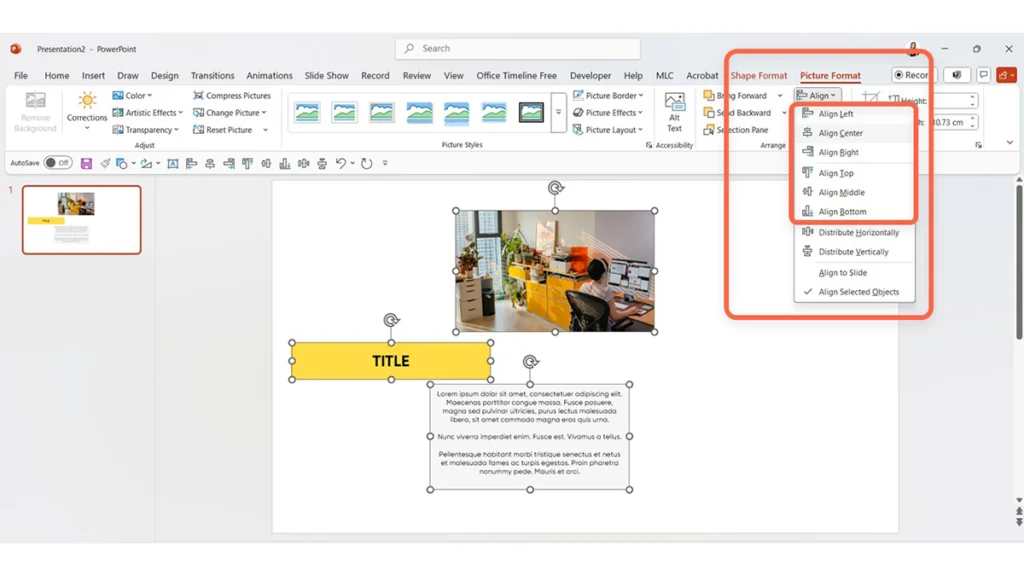
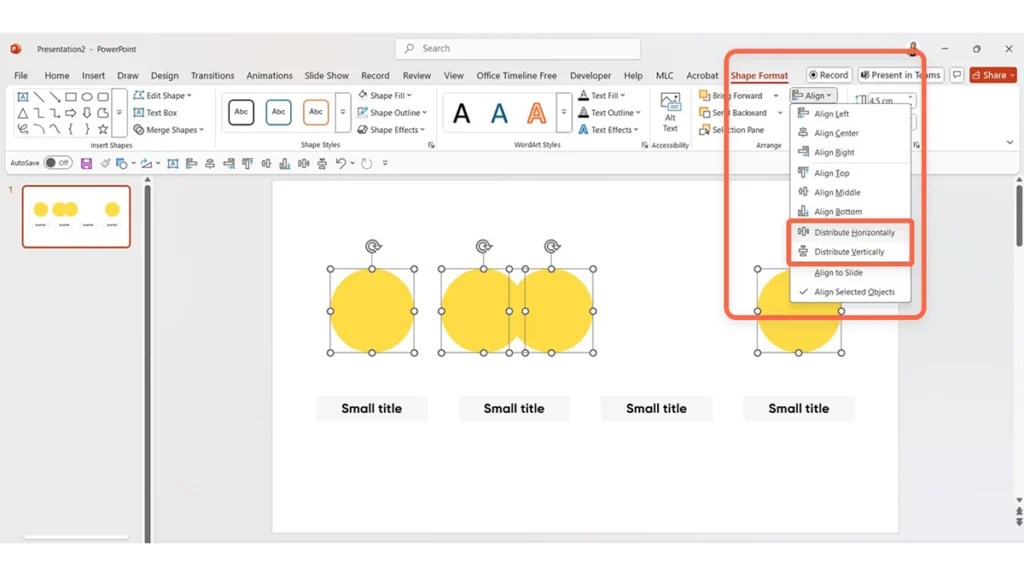
With the objects selected, open the contextual formatting tab and choose Align. The tab name changes with the object type, but the alignment menu contains the same core commands.
3. Choose the correct reference mode
PowerPoint gives you two reference modes:
- Align Selected Objects: aligns the objects within the bounds of the selection.
- Align to Slide: aligns the selection to the slide’s edges or center.
This setting remains active, so check it whenever an object jumps to the edge of the slide unexpectedly.
4. Apply one of the six alignment commands
- Align Left: all left edges share the same position.
- Align Center: all horizontal centers share the same position.
- Align Right: all right edges share the same position.
- Align Top: all top edges share the same position.
- Align Middle: all vertical centers share the same position.
- Align Bottom: all bottom edges share the same position.
The command does not resize the objects. Objects with different widths or heights remain different sizes; only their position changes.
How to distribute objects evenly
Select at least three objects, choose Align, and then choose Distribute Horizontally or Distribute Vertically.
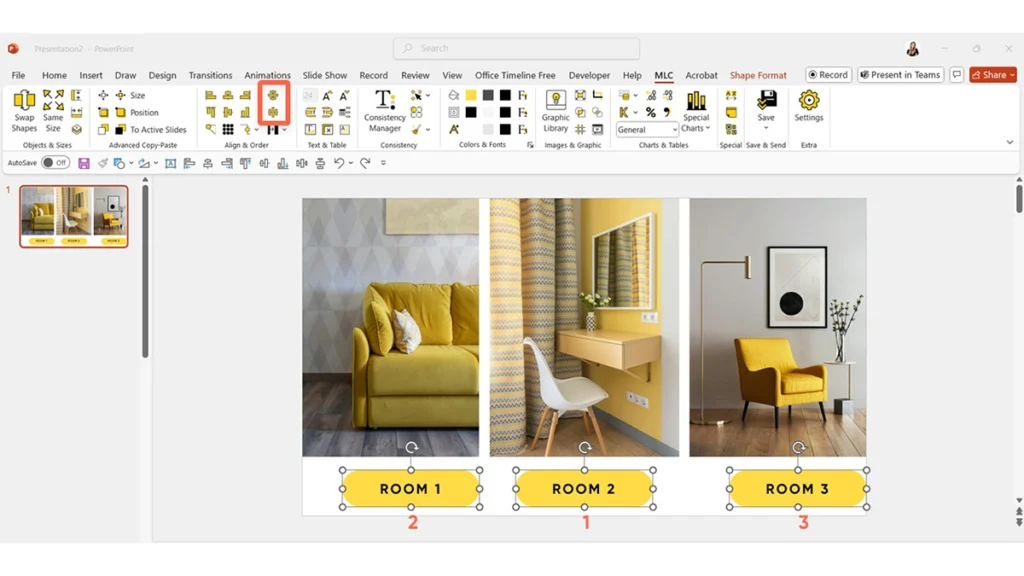
PowerPoint treats the outermost objects as the boundaries of the distribution and spaces the objects between them evenly. That means you should first place the two outer objects where you want the row or column to begin and end.
For a clean row of cards:
- Position the first and last card.
- Select all cards.
- Choose Align Middle.
- Choose Distribute Horizontally.
Why objects sometimes move in the wrong direction
Most unexpected alignment results come from one of four causes:
- Align to Slide is active. The objects move toward the slide edge or center instead of aligning with one another.
- The wrong object is included. A hidden, tiny or distant object expands the selection bounds.
- The objects are grouped. PowerPoint aligns the entire group as one object.
- Distribution boundaries are poorly positioned. The outermost objects define the available spacing.
If the result looks wrong, undo once, open the Selection Pane, verify the selected items and reference mode, then apply the command again.
Does selection order matter in PowerPoint?
In PowerPoint’s native Align menu, the first object you click is not retained as a permanent reference object. The result is calculated from the selected set or from the slide, depending on the active mode.
This can be inconvenient when one carefully positioned object must stay fixed while all other objects align to it. You can work around the limitation by aligning in smaller sets, using guides, or restoring the reference object’s position after the command. A reference-object workflow in an add-in is faster when this situation occurs frequently.
Smart Guides versus alignment commands
Smart Guides appear while you drag an object and help you spot matching centers, edges and spacing. They are excellent for fast visual adjustments.
Use alignment commands when precision and repeatability matter. A good rule is:
- use Smart Guides while exploring a layout;
- use Align and Distribute when finalizing it;
- use the Selection Pane when the slide is crowded;
- use a repeatable add-in workflow when you format many slides or many objects.
Faster alignment with the MLC PowerPoint Add-in
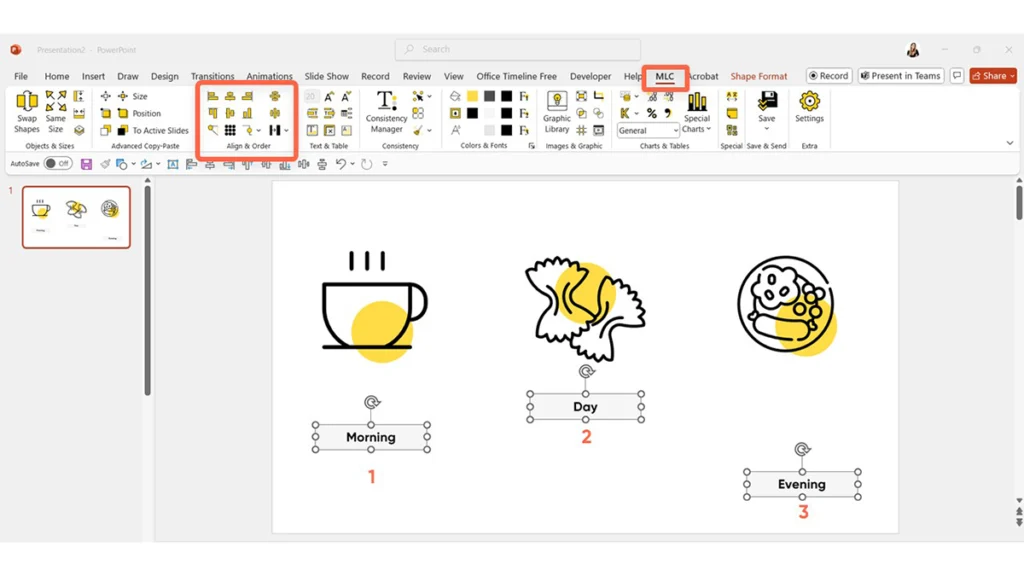
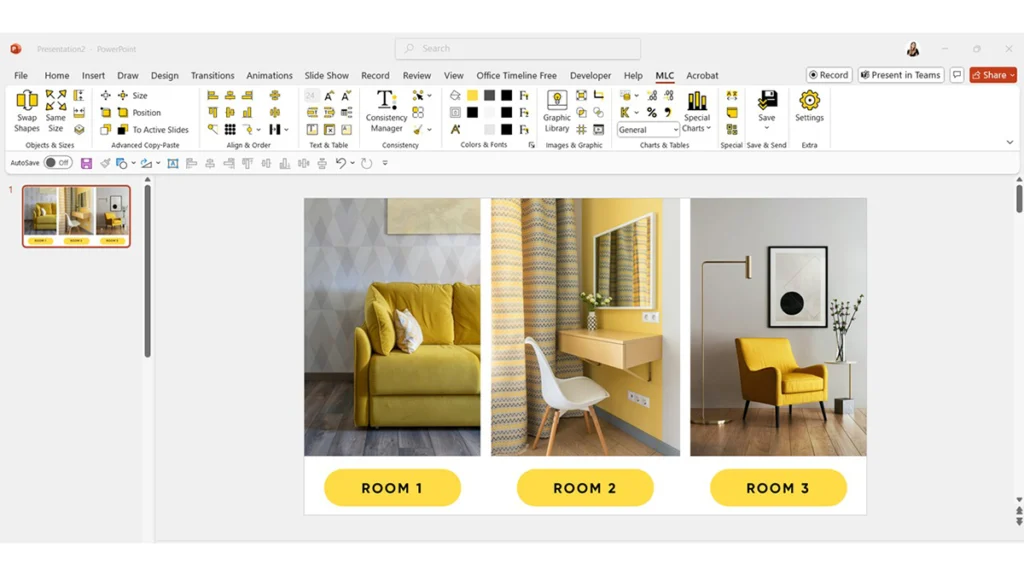
The MLC PowerPoint Add-in is designed for frequent slide-formatting work. Its alignment tools keep the main commands readily available and support a reference-object workflow: select the object that should act as the reference first, add the other objects, and apply the required alignment or distribution command from the MLC ribbon.
This is especially useful when:
- a logo, title or card must remain exactly where it is;
- you repeatedly align multiple objects to the same visual anchor;
- you need alignment and distribution commands without moving through several ribbon menus;
- you are cleaning a large deck and small time savings accumulate across hundreds of actions.
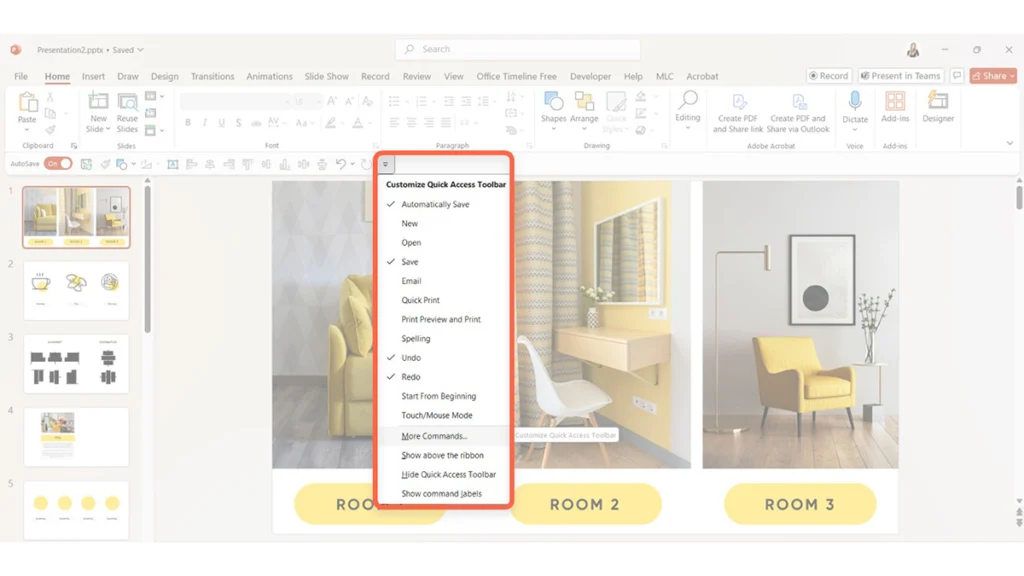
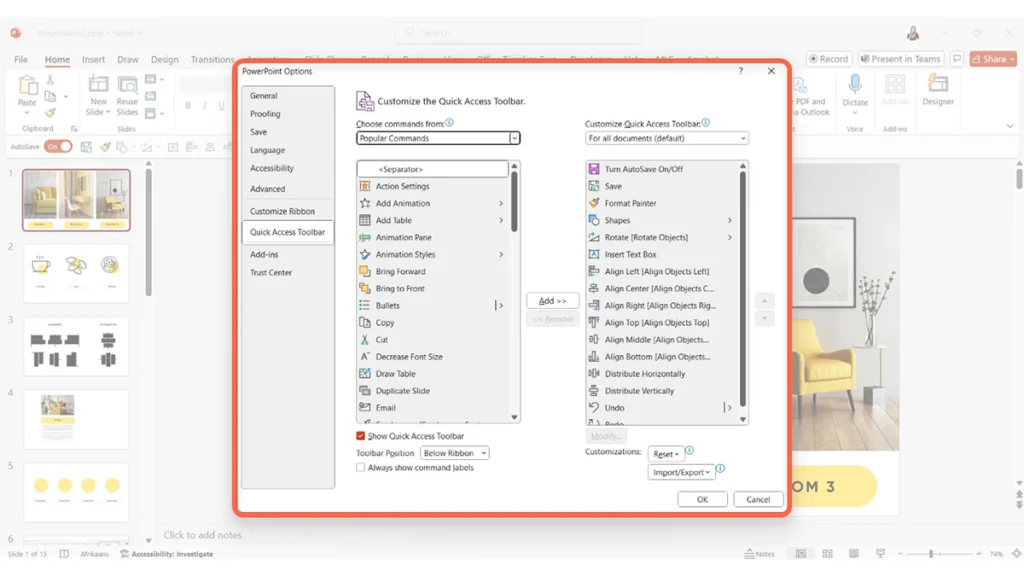
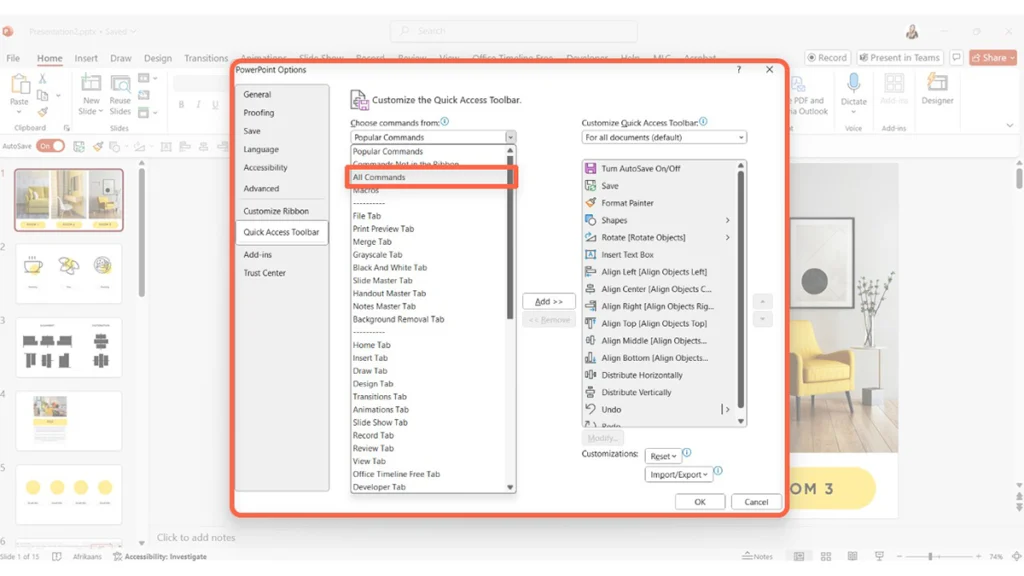
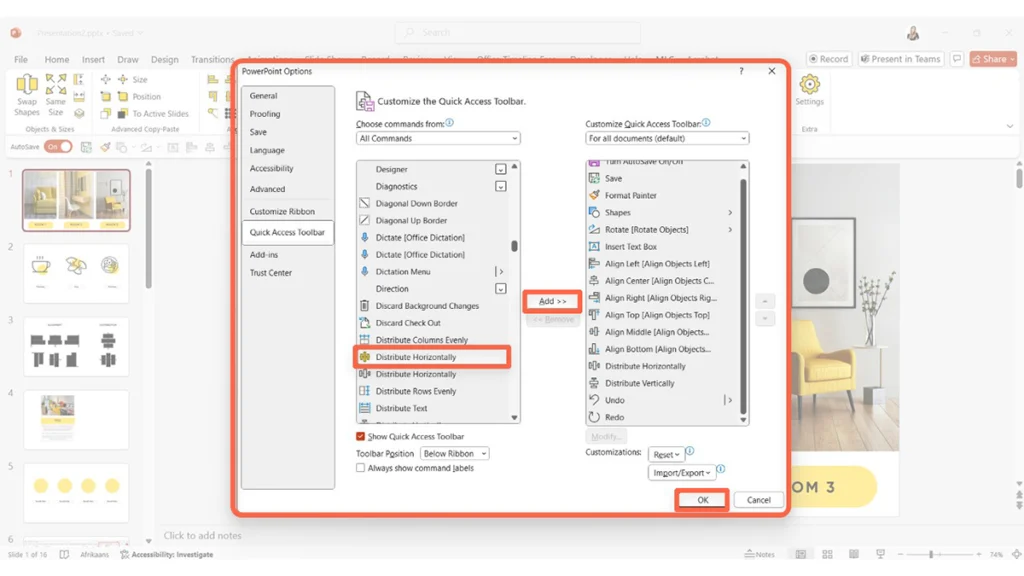
Add the commands to the Quick Access Toolbar
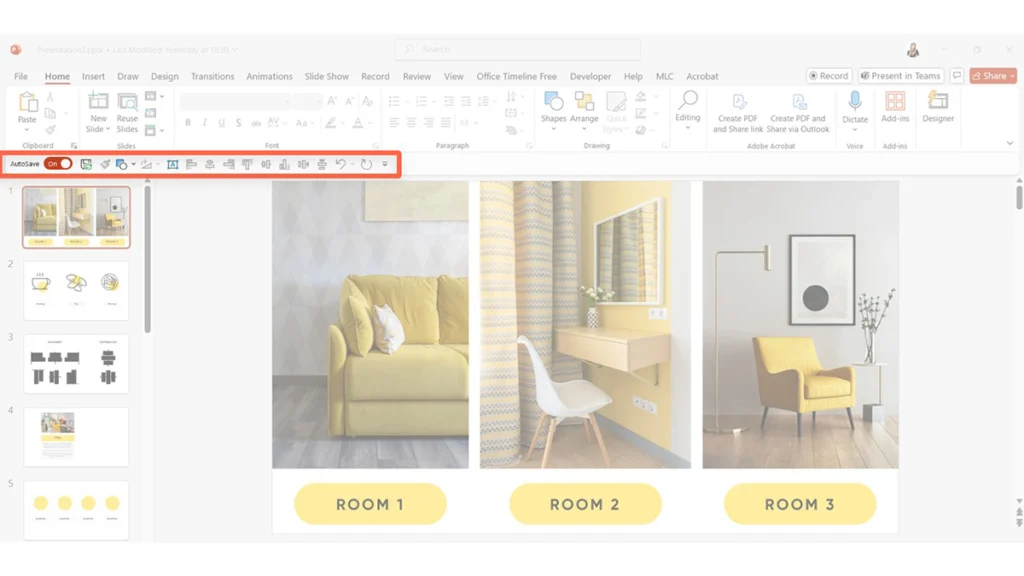
If you prefer PowerPoint’s native commands, add the most-used alignment actions to the Quick Access Toolbar. Right-click a command and choose Add to Quick Access Toolbar. This reduces navigation, although it does not change PowerPoint’s reference logic.
Watch the alignment workflow
The video demonstrates the practical difference between alignment and distribution and shows how the commands fit into a real slide-formatting workflow.
Common alignment problems and fixes
The Distribute command is unavailable
Select at least three objects. Two objects can be aligned, but there is no intermediate object to distribute between them.
Text looks misaligned even when the text boxes are aligned
The text boxes may have different internal margins, paragraph spacing or vertical text alignment. Check Format Shape > Text Options > Text Box and compare paragraph settings.
Icons look uneven despite equal spacing
Icons can have different internal whitespace inside their bounding boxes. Aligning the boxes is mathematically correct but may look optically wrong. Make a small visual adjustment after distribution or normalize the icon files.
An object moves to the slide edge
Open the Align menu and switch from Align to Slide to Align Selected Objects.
Objects will not align independently
They may be grouped. Ungroup them temporarily, align the individual elements, and group them again.
Frequently asked questions
How do I align multiple shapes in PowerPoint?
Select the shapes, open Shape Format > Align, choose Align Selected Objects, and apply the left, center, right, top, middle or bottom command you need.
What is the difference between Align Selected Objects and Align to Slide?
Align Selected Objects positions items relative to the selected set. Align to Slide positions them relative to the slide canvas.
How do I make spacing equal between objects?
Select at least three objects and use Distribute Horizontally or Distribute Vertically. Position the outermost objects first because they define the distribution boundaries.
Why does PowerPoint move all my objects?
PowerPoint calculates alignment from the entire selection or the slide. Check the reference mode, selection contents and grouping before applying the command.
Can PowerPoint align to the first selected object?
The native Align menu does not preserve the first selected object as a permanent reference. A reference-object workflow, such as the one provided by the MLC PowerPoint Add-in, is useful when one object must remain fixed.
What is the fastest way to align objects repeatedly?
Add common commands to the Quick Access Toolbar or use the MLC PowerPoint Add-in to keep alignment, distribution and reference-object actions together in a repeatable workflow.
Create cleaner slides in less time
Alignment is a small action with a large visual effect. Start by choosing the correct reference mode, align before distributing, and check the Selection Pane whenever the result is unexpected.
If alignment is one of dozens of repetitive formatting actions in your daily work, explore the MLC PowerPoint Add-in, try it free for 7 days and evaluate the time saved on a real presentation.
Download the complete alignment guide
Keep the workflow at hand. Download the fully formatted PDF version of this article with the steps, examples and troubleshooting checklist.



Comments on How to Align Shapes and Objects in PowerPoint