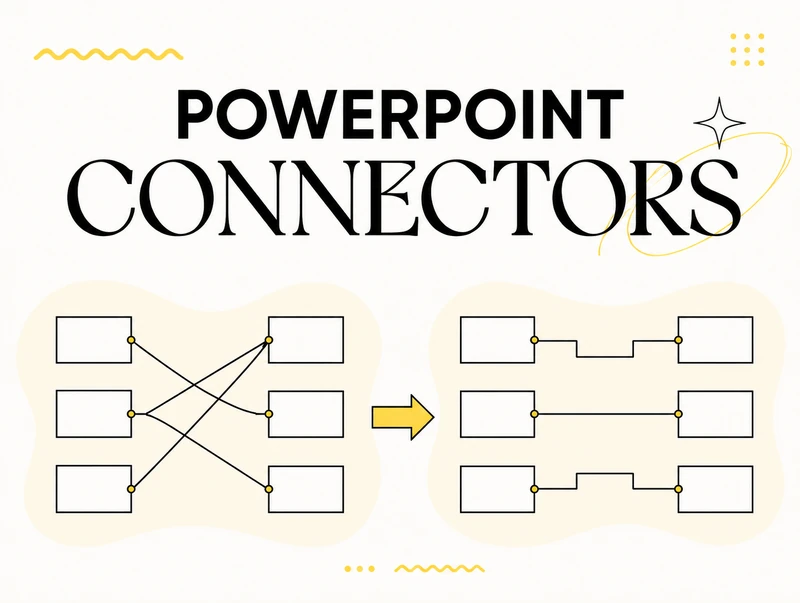

PowerPoint connectors are not ordinary lines. They attach to shapes through connection points and stay linked when you move or resize the objects on your slide. That makes them the right choice for flowcharts, process diagrams, organizational charts and any visual where relationships must remain clear while the layout changes.
In this guide, you will learn how to:
- create straight, elbow and curved connectors;
- attach them to the correct connection points;
- change the path of an elbow connector;
- work around the limitations of PowerPoint connection points;
- align several connectors into a clean, professional diagram;
- troubleshoot connectors that detach, cross or refuse to route correctly.
For a broader system that connects diagrams with alignment, image handling, slide libraries, timelines and other recurring tasks, explore the PowerPoint productivity workflows guide.
If you only need to fix one diagram, PowerPoint’s native tools may be all you need. If you build and adjust diagrams repeatedly, I will also show you how the MLC PowerPoint Add-in can remove some of the repetitive alignment work.
Key takeaways
- A connector stays attached to a shape; a normal line does not. Test the connection by moving the shape after drawing the line.
- PowerPoint provides straight, elbow and curved connectors. Choose the simplest type that makes the relationship easy to follow.
- Clean diagrams depend on the position of the shapes before the connectors are added. Align and distribute the objects first whenever possible.
- The yellow adjustment handle helps you change the path of an elbow connector, but complex diagrams can still require repetitive manual work.
- PowerPoint does not provide Visio’s dedicated Add Connection Point tool. Editing a shape’s points is a workaround that changes the shape geometry and should be used carefully.
- The MLC PowerPoint Add-in can accelerate recurring alignment tasks when several connectors or slide objects must follow the same reference.
What is a connector in PowerPoint?
A connector is a line designed to link two shapes. Each end can attach to a connection point on a shape, so the line remains connected when the shape moves.
This is the practical difference between a connector and a regular line:
- Regular line: visually touches an object but may stay behind when the object moves.
- Connector: snaps to a connection point and follows the attached shapes.
That behaviour is essential in diagrams that will change over time. You can reorganize a process map, move a department in an organization chart or adjust a project flow without redrawing every relationship from scratch.

How to add a connector in PowerPoint
- Go to Insert > Shapes.
- In the Lines group, choose a straight, elbow or curved connector.
- Move the pointer over the first shape until its connection points appear.
- Click a connection point and drag towards a connection point on the second shape.
- Release the mouse when the endpoint snaps into place.
- Move one of the shapes to verify that the connector follows it.


Tip: draw the same connector several times
If you need to create many connectors, right-click the connector type in the Shapes gallery and choose Lock Drawing Mode. PowerPoint will keep the tool active until you press Esc. This is useful for process maps and organization charts with repeated relationships.
Straight, elbow or curved connector: which should you use?
PowerPoint offers three connector types.
Straight connector
Use a straight connector when two objects have a direct relationship and the line does not pass through other content. It is the cleanest option and usually the easiest to read.
Elbow connector
Use an elbow connector when the line needs to turn around other shapes or when you want a structured, orthogonal diagram. Elbow connectors are especially useful for organization charts, workflows and dependency maps.
Curved connector
Use a curved connector sparingly. It can separate overlapping paths or create a softer visual flow, but too many curves can make a business diagram look less precise.
A useful rule is simple: use the connector with the fewest bends that can communicate the relationship clearly.
How to turn a straight connector into an elbow connector
You do not always need to redraw the line.
- Select the connector.
- Right-click it.
- Open Connector Types.
- Choose Elbow Connector.
The available wording can vary slightly between PowerPoint versions, but the connector types remain straight, elbow and curved.


How to change the path of an elbow connector
Select an elbow connector and look for its yellow adjustment handle. Dragging this handle changes the position of the bend without detaching the endpoints.
For a clean result:
- keep parallel segments on the same horizontal or vertical level;
- leave enough space between the connector and nearby shapes;
- avoid unnecessary bends;
- keep similar relationships visually consistent;
- move and align the shapes before fine-tuning every connector.
If the diagram is still changing, do not spend too long perfecting the connector paths. Finalize the position of the shapes first, then make the connector adjustments.

Why PowerPoint connectors cross each other
Connector crossings usually come from the layout rather than the line itself. Common causes include:
- shapes positioned too close together;
- inconsistent connection points;
- too many relationships occupying the same area;
- objects aligned visually but not distributed evenly;
- connectors added before the diagram structure was finalized.
Try this sequence before adjusting every line individually:
- Group related shapes into clear rows or columns.
- Align the shapes to a common reference.
- Distribute them evenly.
- Attach equivalent connectors to equivalent sides of the shapes.
- Adjust the elbow paths only after the structure is stable.
If several lines still need to cross, consider splitting the diagram across two slides or revealing relationships progressively. A diagram should explain the system, not prove that everything fits on one slide.
Can you add custom connection points in PowerPoint?
PowerPoint does not offer a dedicated Add Connection Point command like Microsoft Visio.
You can use Shape Format > Edit Shape > Edit Points to modify the geometry of a shape. Connectors may then attach to the resulting points, but this is a workaround, not a separate connection-point editor. Moving or adding edit points can change the outline of the shape.
Before using this method:
- duplicate the shape as a backup;
- remove complex effects temporarily so the points are easier to edit;
- make the smallest possible geometry change;
- check that the shape still looks correct at presentation size;
- reconnect and move the shape to test the result.
For some diagrams, a small invisible helper shape can provide a safer attachment location than altering a branded or complex shape. Use this technique carefully and document it if other people will edit the presentation.


How to align several connectors consistently
When multiple elbow connectors should share the same height or vertical position, adjusting every yellow handle by eye is slow and often inaccurate.
The manual method is to:
- set one connector as the visual reference;
- activate guides or gridlines;
- move each remaining connector handle to the same guide;
- zoom in and check the result;
- zoom out and confirm that the diagram still feels balanced.
This works, but it becomes repetitive when the diagram changes or contains many connectors.
A faster recurring workflow with MLC PowerPoint Add-in
The current MLC workflow demonstrated in this guide uses one adjusted connector as the reference for the others.
- Adjust the first connector to the required height or position.
- Select the reference connector and the other connector or connectors you want to align.
- Use the relevant Align Horizontal or Align Vertical command in the MLC PowerPoint Add-in.
- Check the endpoints and the overall diagram after the alignment.
The advantage is not that PowerPoint’s native tools become unnecessary. The advantage is repeatability: when you work on diagrams every day, removing several small manual adjustments saves time and reduces inconsistencies.

Practical uses for connectors in business presentations
Process maps and flowcharts
Connectors show the sequence of activities, decisions and outcomes. Keep the main flow moving in one direction and use line styles consistently. If an exception or alternative path matters, label it instead of relying only on a different line color.
Organizational charts
Elbow connectors help show reporting lines between roles and teams. Align the boxes before adding the connectors and maintain the same vertical distance between equivalent levels of the hierarchy.
Project dependencies
Connectors can show that one activity depends on another. Do not confuse this with a complete Gantt chart: use connectors when the relationship itself is the message, and a Gantt chart when timing and duration are essential.
Systems and information flows
Use connectors to show how information, decisions or resources move between departments or components. Add arrowheads only when direction matters.
Concept maps
Curved or straight connectors can help organize related ideas. Limit the number of relationships displayed at once, especially when the audience will see the slide for only a few seconds.
Common PowerPoint connector problems
My connector detaches when I move a shape
The endpoint probably did not snap to a connection point, or you selected a regular line rather than a connector. Reattach the endpoint and move the shape to test it.
Connection points do not appear
Return to Insert > Shapes and make sure you selected a connector. PowerPoint’s Curve, Freeform and Scribble tools are lines or freeform shapes, not connectors.
The elbow connector takes an awkward route
Move the shapes into a clearer structure first, then drag the yellow adjustment handle. Reducing the number of obstacles usually produces a cleaner path than repeatedly adjusting the connector.
My connectors look misaligned
Align and distribute the shapes first. Then use guides to standardize the connector bends. If this is recurring production work, use a reference-based alignment workflow such as the one demonstrated with the MLC PowerPoint Add-in.
The diagram is still difficult to read
The problem may be information density rather than formatting. Remove secondary relationships, separate the diagram into stages or reveal the flow progressively across slides.
PowerPoint connectors FAQ
What is the difference between a line and a connector in PowerPoint?
A connector attaches to connection points on shapes and stays linked when the shapes move. A regular line can touch a shape visually without remaining attached.
What types of connectors are available in PowerPoint?
PowerPoint provides straight, elbow and curved connectors. Choose the type under Insert > Shapes > Lines.
How do I make an elbow connector change direction?
Select the connector and drag its yellow adjustment handle. You may need to reposition the connected shapes first to give the connector a clearer route.
Can I create new connection points on a PowerPoint shape?
PowerPoint does not have Visio’s dedicated connection-point tool. You can edit the shape’s geometry with Edit Points, but this may change the shape and should be treated as a careful workaround.
Why does a connector move when I rearrange the slide?
That is the intended behaviour. A connector follows the shapes to which its endpoints are attached. If you want a static line, use a normal line instead.
How can I keep several connectors aligned?
First align and distribute the connected shapes. Then use guides to match the connector bends. For recurring work, the MLC PowerPoint Add-in can reduce repetitive alignment steps by applying a consistent reference.
Build diagrams that remain clear when the slide changes
The value of a connector is not the line itself. It is the relationship the line helps your audience understand.
Use PowerPoint’s native connector tools when you are creating an occasional diagram. Keep the shapes organized, choose the simplest connector type and test every connection by moving the objects.
If aligning connectors, shapes and other slide elements is part of your daily work, try the MLC PowerPoint Add-in on one of your own diagrams and compare the workflow.
Build cleaner PowerPoint diagrams faster
Speed up recurring alignment tasks while keeping full control of your slides. Available for Windows.



Comments on PowerPoint Connectors: The Complete Guide to Clean, Editable Diagrams