Some PowerPoint commands are simple but expensive in clicks. You use them again and again, yet every time you have to change tabs, open a menu and find the same option. That friction feels small until you repeat it across dozens of slides.
The PowerPoint Quick Access Toolbar solves that problem. It keeps your most useful commands visible independently of the ribbon tab you are using, so a multi-click action can become a one-click action.
In this beginner-friendly guide, I will show you exactly how to set it up, how to decide which commands deserve a place, how to move it closer to the slide, and how to export or import your setup when you change computer.
Quick answer: how to customize the Quick Access Toolbar in PowerPoint
- Open PowerPoint and select the small Customize Quick Access Toolbar arrow.
- Choose More Commands.
- Set Choose commands from to All Commands.
- Select a command on the left and choose Add.
- Use the arrows on the right to place commands in the order you want.
- Choose OK, then test the buttons on a real slide.
- Optionally show the toolbar below the ribbon and export the customization file as a backup.
Key takeaways
- Add commands you use frequently and that normally require several clicks.
- Keep the toolbar below the ribbon if you want it closer to the slide workspace.
- Right-click a visible ribbon command to add it instantly, or use More Commands to search the complete list.
- A gray command is often unavailable because the slide object it needs is not selected.
- Export your setup before changing computer or importing somebody else's customization file.
What is the Quick Access Toolbar in PowerPoint?
The Quick Access Toolbar, often shortened to QAT, is a customizable row of buttons that remains available while you move from one ribbon tab to another. It is designed for commands you want to reach without navigating through PowerPoint's interface every time.
You can place it above or below the ribbon. The exact default location can vary by PowerPoint version and interface configuration. I prefer it below the ribbon because it is closer to the slide, which reduces mouse travel during repetitive formatting work.
Why the Quick Access Toolbar saves time
- Fewer clicks: a command buried in a menu becomes one button.
- Less ribbon switching: the same controls stay visible while you change tabs.
- Lower cognitive load: you stop searching for the same commands and build a consistent muscle memory.
- A setup that follows your workflow: your toolbar can reflect the tasks you perform every day, not PowerPoint's generic defaults.
- Portability: you can export the setup and import it on another computer.
How to set up the Quick Access Toolbar step by step
Step 1. Decide which commands belong there
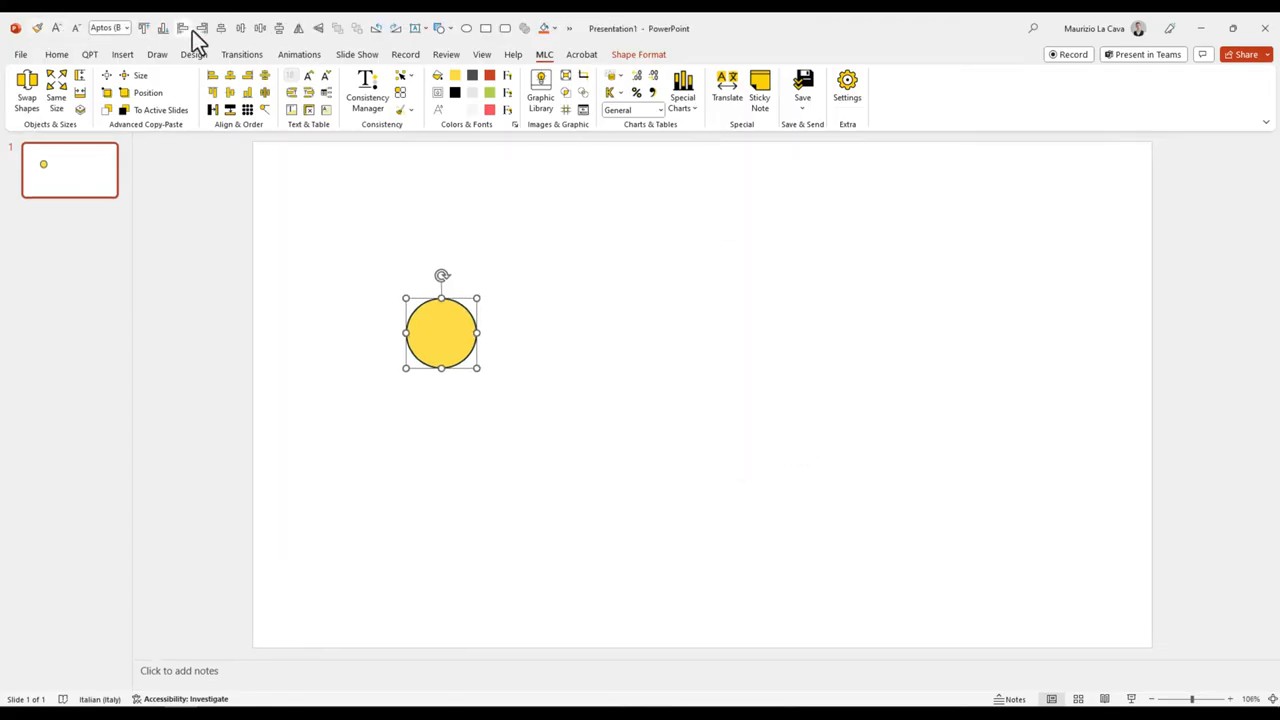
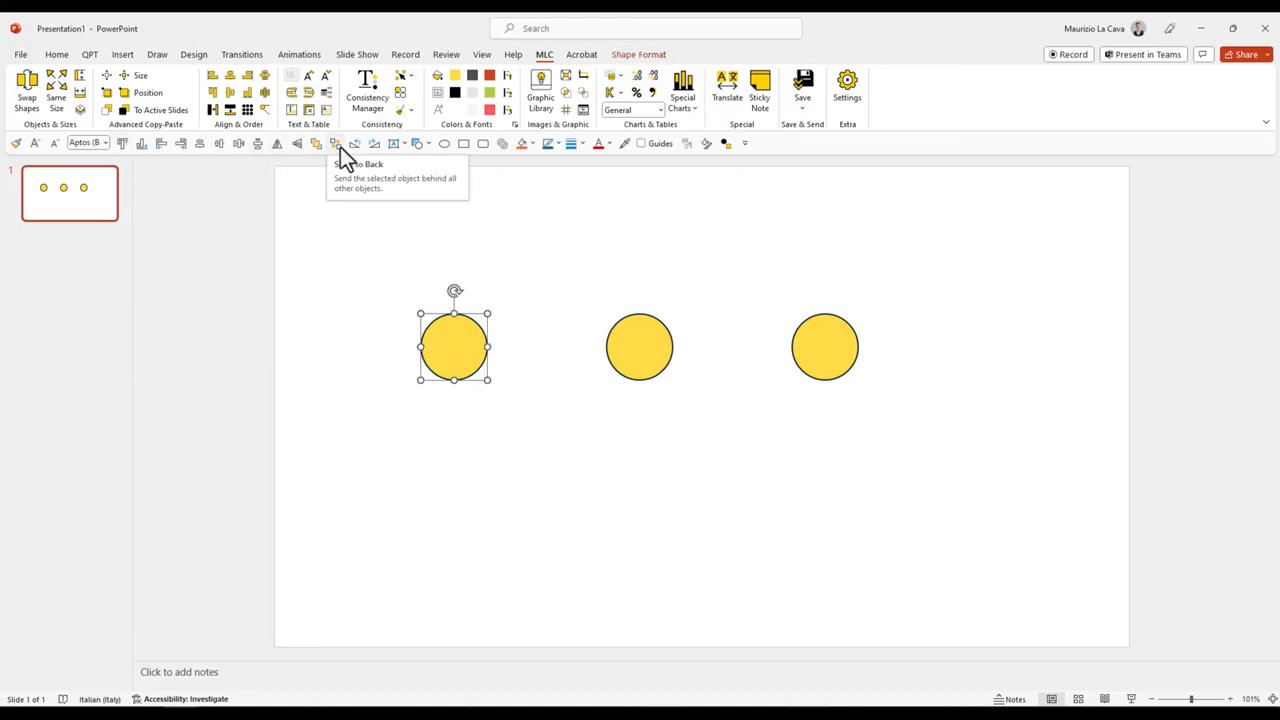
Start with the work you actually repeat. In the video, I use alignment and distribution, Bring to Front, Send to Back and Flip as examples because they are recurring formatting actions that otherwise require opening menus.
Your list may be different. Save As, Selection Pane, Paste Special or specific chart and shape commands can be more valuable if they match your daily work. The principle is simple: frequent plus multi-click equals a strong Quick Access Toolbar candidate.
Step 2. Open the customization menu
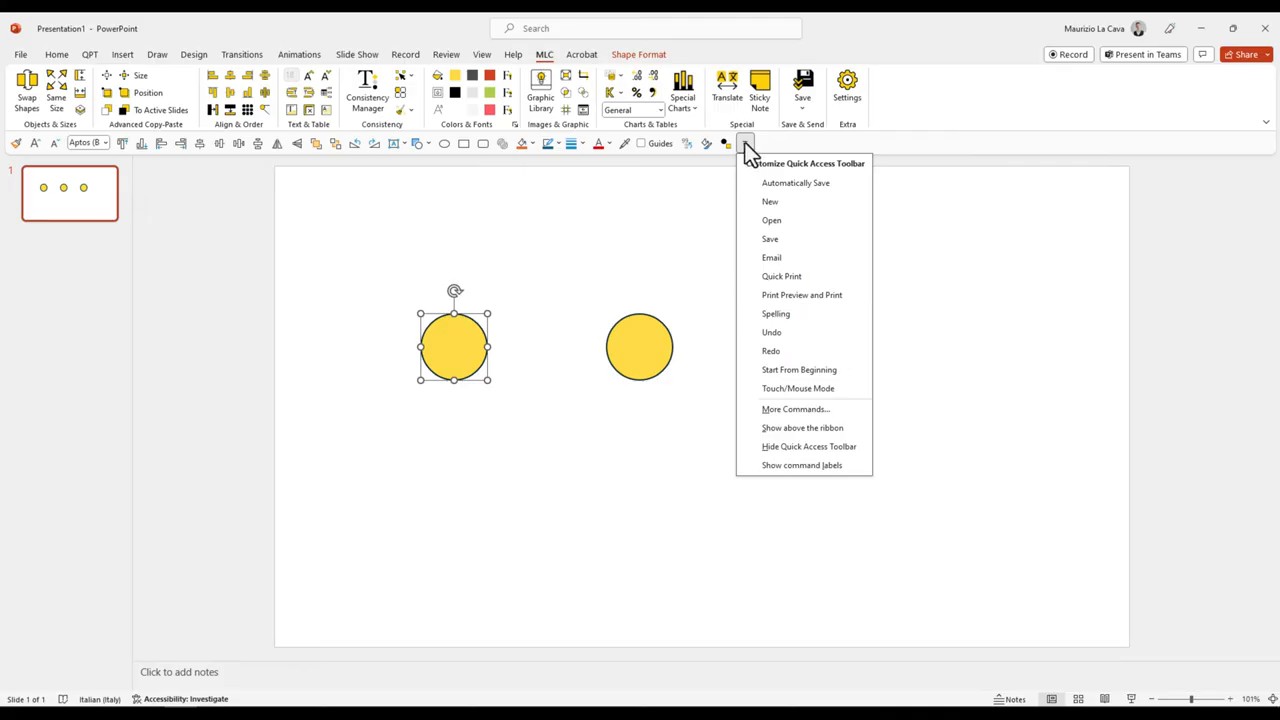
Select the small arrow at the end of the Quick Access Toolbar. Its exact position changes depending on whether your toolbar is above or below the ribbon. Then choose More Commands.
Step 3. Show the complete command list
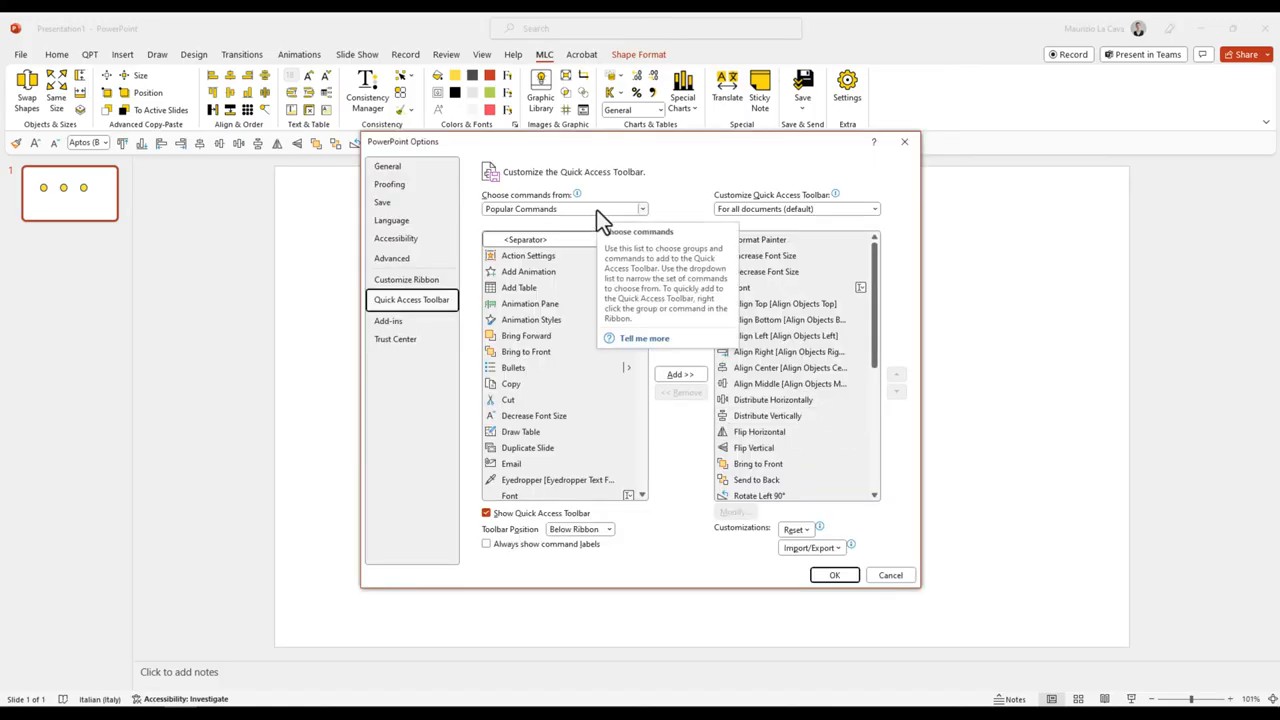
PowerPoint Options opens directly on the Quick Access Toolbar page. Use the Choose commands from drop-down list and select All Commands. The left panel now contains the complete alphabetical list of commands you can add; the right panel shows your current toolbar.
Step 4. Add, remove and reorder commands
Select a command in the left panel and choose Add. It appears in the list on the right. Use the up and down arrows beside that list to control the order in which the buttons appear. To remove an item, select it on the right and choose Remove.
Order matters. Keep commands you often use together next to one another, such as Align Left, Align Center, Align Right, Distribute Horizontally and Distribute Vertically. A coherent group is faster to recognize than a random sequence of icons.
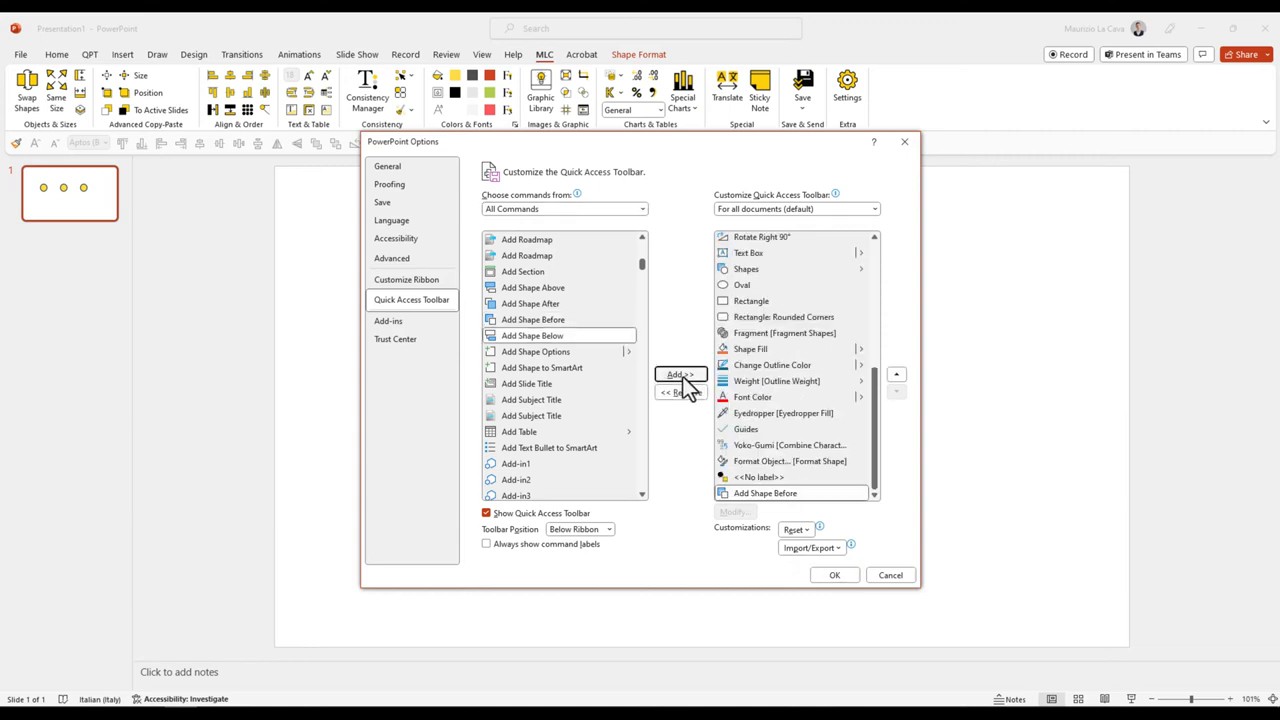
Step 5. Use the right-click shortcut for visible commands
If the command is already visible on the ribbon, there is a faster route: right-click the command and choose Add to Quick Access Toolbar. This is ideal when you are working and notice that you have reached for the same control several times.
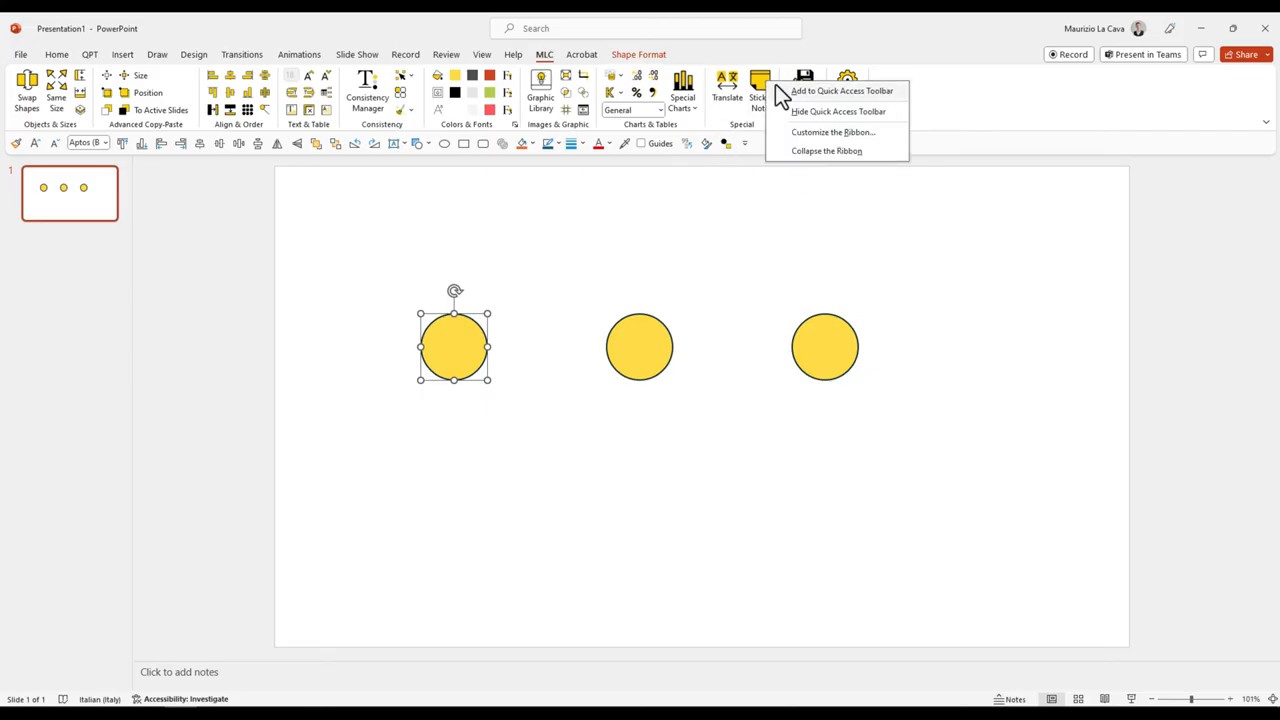
Step 6. Move the toolbar below the ribbon
In the Quick Access Toolbar options, select Show Quick Access Toolbar below the Ribbon. You can also move it from the small toolbar menu in many PowerPoint versions.
Below the ribbon is not mandatory, but it is my preferred position: your shortcuts sit closer to the slide and the distance between a selected object and the next command is shorter.
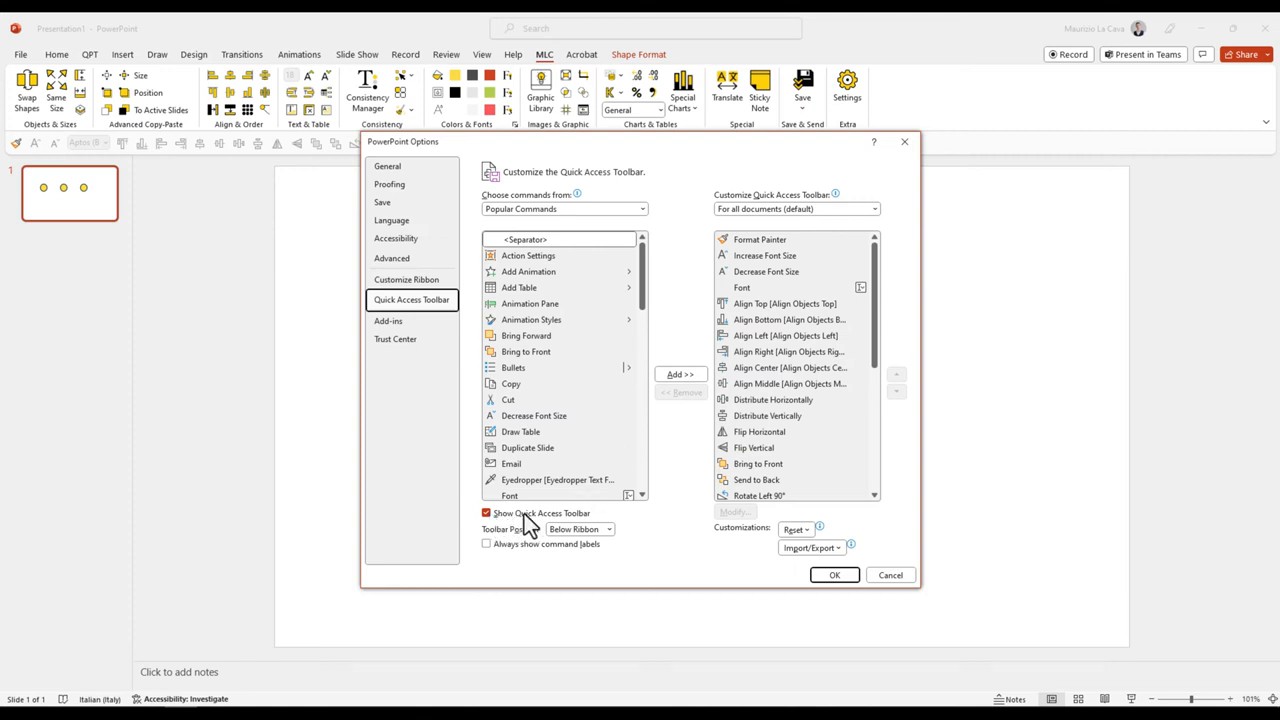
Step 7. Understand why some buttons are gray
A command can appear inactive when it has nothing to act on. Alignment, distribution, ordering and rotation commands normally need one or more objects to be selected. Click a shape, picture or text box and the relevant buttons become available.
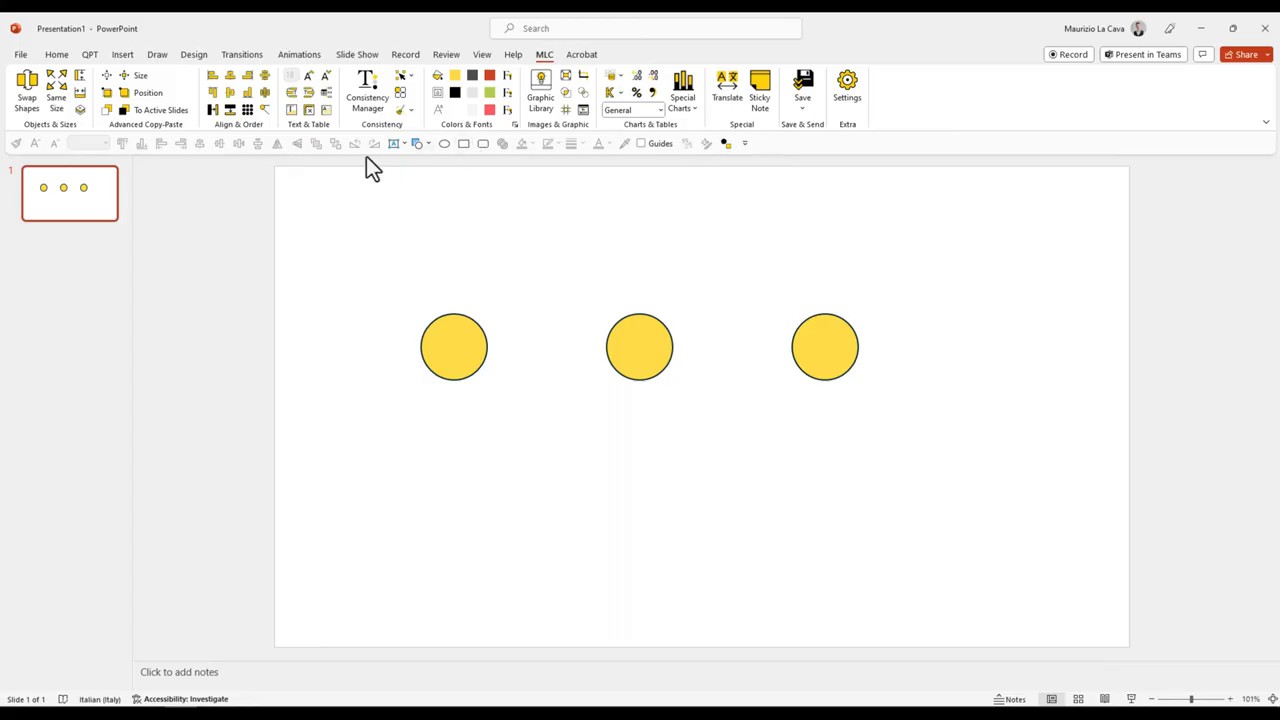
Step 8. Export your Quick Access Toolbar setup
Open File > Options and go to Quick Access Toolbar. Select Import/Export, then Export all customizations. Save the customization file somewhere you can find again, such as a managed team folder or a personal backup location.
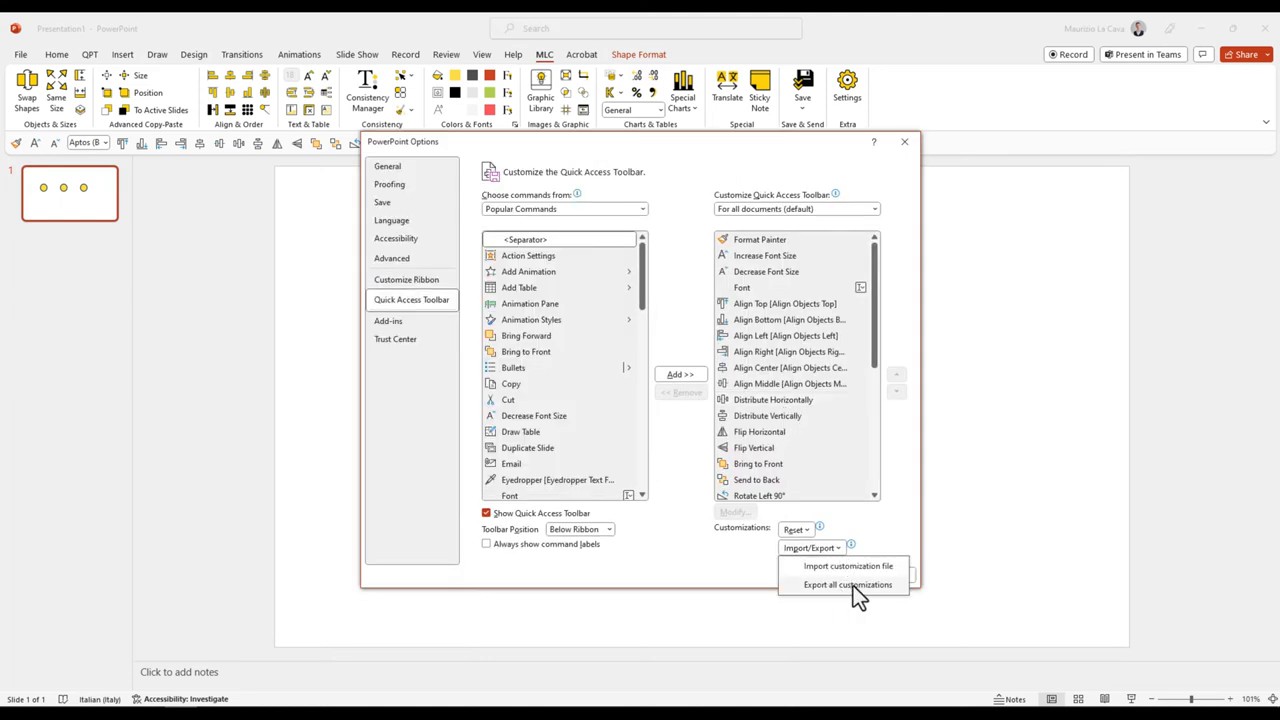
Important: The exported file is a settings file, not a presentation. Import it from inside PowerPoint Options.
Step 9. Import a saved customization file
On the new computer, return to File > Options > Quick Access Toolbar. Select Import/Export, choose Import customization file and select the file you exported.
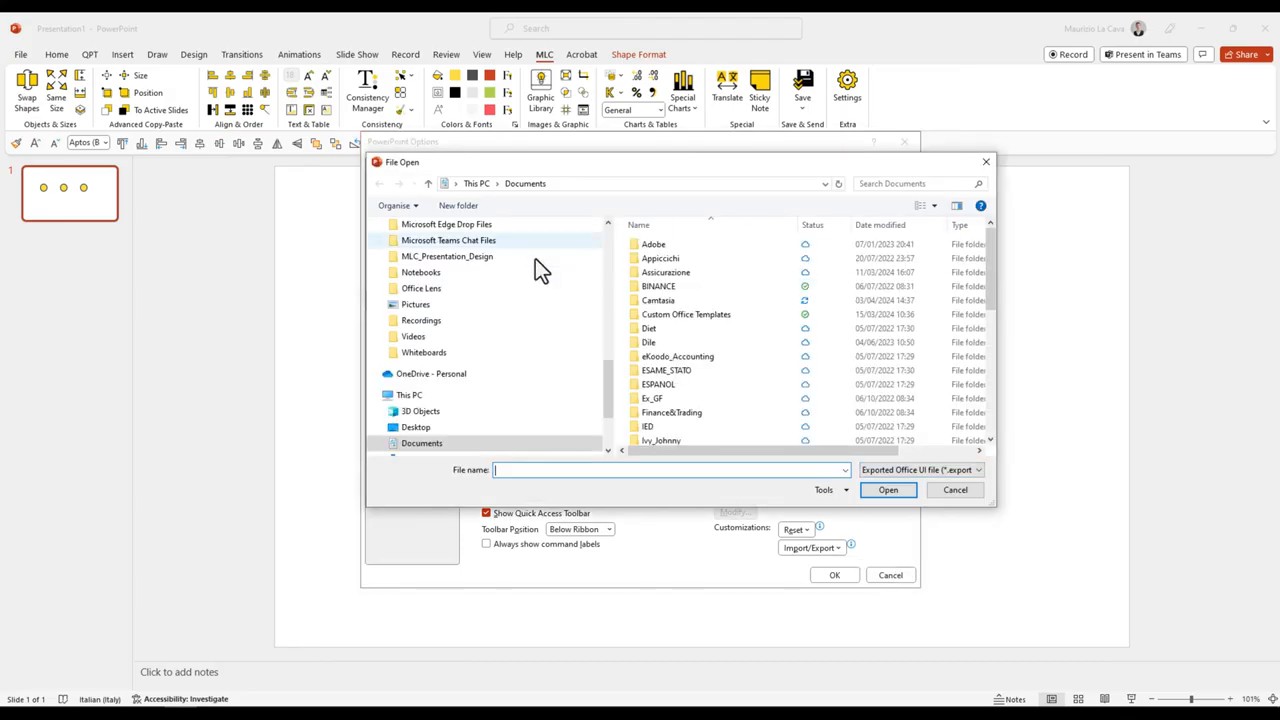
Back up first: Importing a customization file replaces the current ribbon and Quick Access Toolbar customizations. Export the current setup before importing if you may want to restore it later.
A practical starter setup
There is no universal perfect toolbar. A good beginner setup is small enough to memorize and focused on repetitive tasks. Start with a compact group, use it for a week and remove anything you never click.
- Save and Save As, if you work with many versions or local files.
- Undo and Redo, especially if your current PowerPoint layout hides them.
- Align Left, Center, Right, Top, Middle and Bottom.
- Distribute Horizontally and Distribute Vertically.
- Bring to Front and Send to Back.
- Flip Horizontal and Flip Vertical.
- Selection Pane, if you often work on crowded slides.
Do not add a command merely because it exists. The Quick Access Toolbar is valuable because it reflects your personal frequency of use.
Common Quick Access Toolbar problems
The Quick Access Toolbar is not visible
Right-click the area above the ribbon and choose Show Quick Access Toolbar, or open the customization menu and enable it. The wording can vary slightly by PowerPoint version.
I cannot find a command
Open More Commands and change Choose commands from to All Commands. Search alphabetically, and remember that PowerPoint may use a different label from the one you use informally.
The command is visible but disabled
Select the object type the command needs. For example, align and distribute commands require shapes, pictures or other slide objects; some commands require multiple selected objects.
My imported setup replaced the old one
That is expected behavior: the import replaces existing ribbon and Quick Access Toolbar customizations. Restore the previous exported file if you created a backup.
The toolbar is too crowded
Remove low-frequency commands and group related actions together. A toolbar you can scan instantly is more useful than a complete catalog of PowerPoint commands.
Frequently asked questions
What is the Quick Access Toolbar in PowerPoint?
It is a customizable toolbar that keeps selected commands available independently of the ribbon tab currently displayed.
How do I add a command to the Quick Access Toolbar?
Right-click a visible ribbon command and choose Add to Quick Access Toolbar, or open the toolbar menu, choose More Commands, select an item and choose Add.
Should I place the Quick Access Toolbar above or below the ribbon?
Both positions work. Below the ribbon places the shortcuts closer to the slide workspace, which can reduce mouse travel during repetitive editing.
Why are some Quick Access Toolbar buttons gray?
The command may require a selected object or a specific object type. Select the relevant shape, picture, text box or group and check again.
Can I transfer my Quick Access Toolbar to another computer?
Yes. Export all customizations from PowerPoint Options, then import the saved customization file on the other computer. Export the destination setup first because importing replaces existing customizations.
Turn repeated clicks into a repeatable workflow
The Quick Access Toolbar is one of the smallest changes you can make to PowerPoint, but it compounds every time you format a slide. Start with the commands you use most, move the toolbar where it is comfortable, and refine the setup after a week of real work.
If you want to go beyond shortcuts and speed up recurring formatting, explore the MLC PowerPoint Add-in. It brings alignment, distribution and other presentation design actions into a workflow built for professional slide production.



Comments on PowerPoint Quick Access Toolbar: How to Set It Up and Work Faster